
Every September we go foraging for blackberries (brambles) along the hedgerows of our local fields. Eating while we pick is mandatory, but what to do with the jars full of berries we collect? Apple and blackberry crumble is always a good one, but this jelly is actually much easier and quicker, as all you need is sugar and lemon juice in addition to the berries.
Which berries to pick?
Wild blackberries or brambles are usually full of little seeds, which is great because it means that they are rich in pectin (which helps the jelly to set), but that is also why turning them into a jelly is preferable over jam. When picking your blackberries, make sure you choose the firmer, slightly more red ones over the soft, ripe ones (eat those while you are picking). The sharper the berries are, the better they are for jams and jellies. This is because the acidity helps the pectin to do its job – we also add lemon juice for this reason.

About the method
There are different methods of making bramble jelly. For example, you can strain the stewed berries slowly (e.g. overnight) and then cook them with the sugar and lemon, or you can add the lemon and sugar before straining. An important point to note with this method is that this straining process has to happen very quickly, as the jelly will begin to set while you are stirring the jam through the sieve and you can end up losing quite a lot of it. Some people strain the cooked berries through a cheese cloth to get rid not only of the seeds but also much of the pulp. I prefer just passing the jelly through a sieve, because it makes it slightly more jam like, as opposed to a clear jelly.
Ideal for novice jam makers
Making preserves is both an art and a science. For jam to keep, the sugar to fruit content has to be 1:1. Unless the fruit itself is quite acidic, you have to add lemon juice (which helps the pectin to set the jam), and the jars have to be sterile. I am still a beginner, which is why whenever I make jam, I store it in the fridge as soon as it is cool enough, and we consume it before it can go bad (usually within one month).
What you need
Ingredients
- 500g wild blackberries
- 500g sugar
- juice of 1 lemon
Equipment
- Heavy bottomed saucepan
- Scales
- 2-3 Jars (I got 2 Bonne Maman jars out of this quantity – these hold about 270ml/9oz)
- Wooden cooking spoons
- Sieve
- Glass or ceramic bowl that can be heated (if you have one with a spout, that would be ideal for decanting later, but if not, you can use a ladle)
- Ladle
- Potato masher (optional)
- Funnel (optional)

Method
Sterilise your jars:
Wash the jars in warm soapy water, dry them with a tea towel and put them on a tray. Pre-heat the oven to 180C (fan) and put the tray with the jars in for 10 minutes.
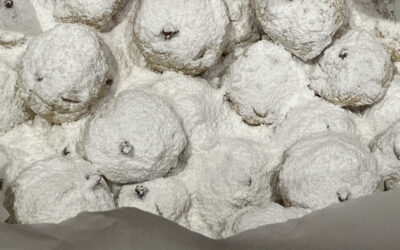
Wash the berries:
Place the berries in a wide bowl and fill it up with water. A lot of the “styles” (the hairy bits on the berries that are left over from the blossoms) will float to the surface of the water. Tip the bowl to one side to let these bits float away, and pick out any flowers or leaves you may have accidentally collected while picking. Repeat this process about three times, until you are happy that the berries are clean.
Cook the berries:
Place the berries in a heavy bottomed saucepan, turn on the heat and let it bubble very gently. Cover with a lid and allow it cook for about 20 minutes. Stir now and then and squash the berries gently (you can use a potato masher if you like).
Add the sugar and lemon juice:
Stir in the sugar and lemon juice and let the mixture bubble gently for another 15 minutes.
Strain it:
Heat up your bowl or jug (either in the oven if it’s still hot from sterilising the jars, or put a bit of water into the bowl and place it in the microwave on full power for 2 minutes, then remove the water).
Place a sieve onto the bowl and pour in the hot berries. Stir vigorously with a wooden spoon until all you have left in the sieve is a paste of pips. Scrape any bits of jelly off the bottom of the sieve into the bowl.
Decant into the jars:
Using a ladle, or the bowl/jug itself, pour the jelly into the sterilised jars, trying not to spill. I don’t have a jam making funnel, so I ladled the jelly directly into the jars, which worked well.
Enjoy:
Consume this jam within about 4 weeks of making it, and store it in the fridge.


0 Comments